Navigating the Barcode Manager Dashboard
Familiarise yourself with the Barcode Manager dashboard before you get started.
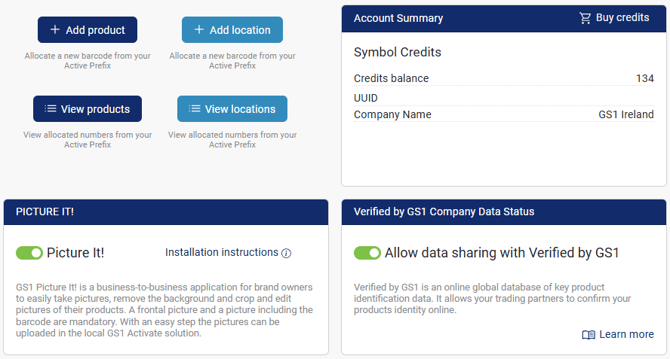
The Dashboard is the first page you will see after logging in to Barcode Manager. There are 4 sections to the Dashboard:
Summary Section
This section can be found at the top of the page.
Here you can Add Products or Locations and View Products or Locations. You can also see an Account Summary, including your Barcode Symbol Credit balance, and opt into using both our GS1 Picture It! app and our Verified by GS1 registration platform.

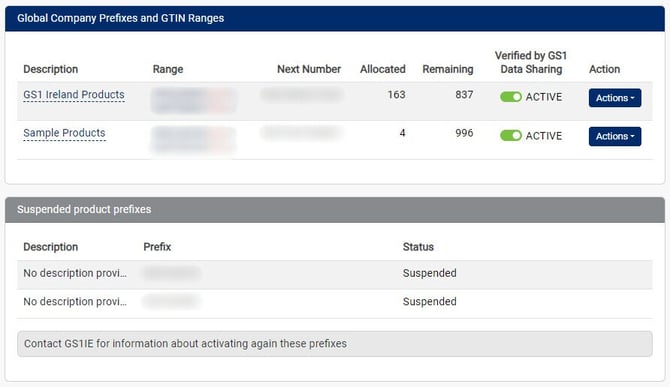
GTIN Ranges
This section can be found in the middle of the page below the summary section.

Here you can see the active prefixes on your account as well as any prefixes that aren't currently using Barcode Manager for product assignment. You can also manage your active prefixed with the Action drop down.
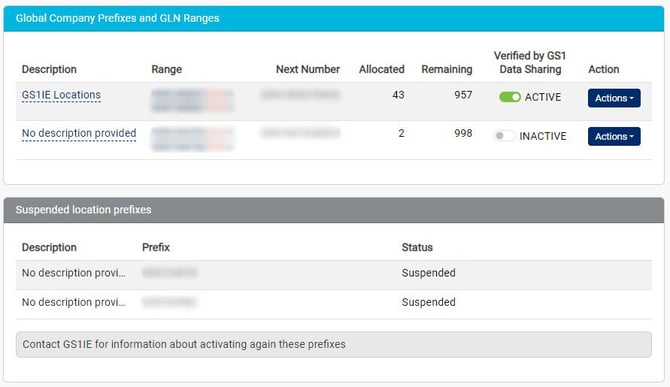
GLN Ranges
This section can be found at the bottom below the GTIN Ranges.
Here you can see the ranges you are able to assign GLNs (Global Location Number) from as well as those that are not currently registered for use on Barcode Manager. The GLNs you create in Barcode Manager are to identify physical locations such as a building, warehouse, or room. GLNs for EDI Locations are a different licence. Please contact our Helpdesk for more information on EDI Location Codes.
Navigation Bar
This section can be found on the left side of the page. From here you can access the Dashboard, Training and Resources, as well as pages to manage your products and GLNs. You can also see which prefix is active and how many numbers have been allocated.
Under Product Manager you can view your products in My Products, export various excel files in Export Products, Import Products, and check the Verified by GS1 Status of your products.
Under Location Manager you can view the GLNs you've assigned. You can also export various excel files and import locations.
To help you navigate Barcode Manager and how to add products, we've created some step by step videos detailing the process.